
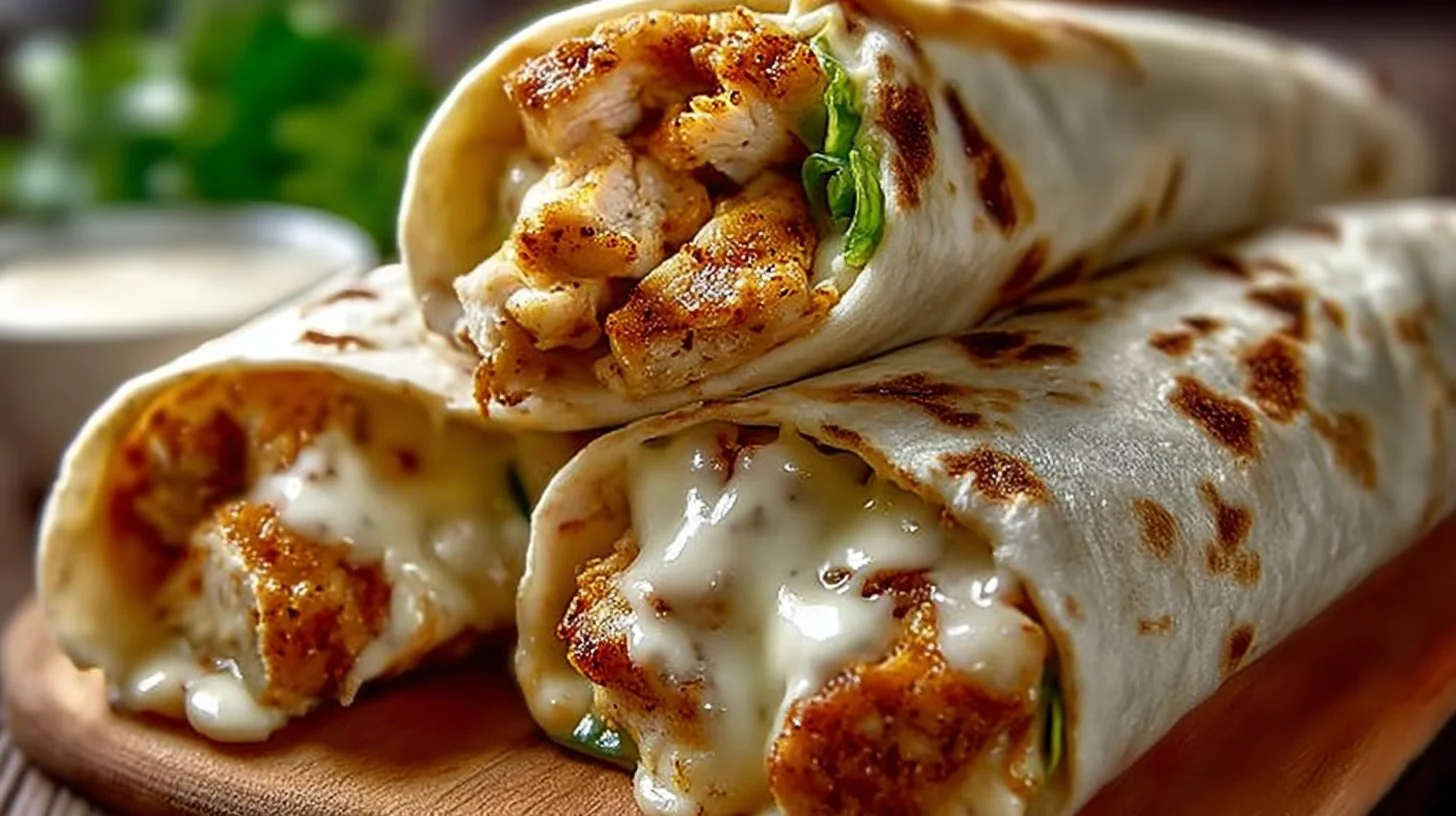
Cheesy Garlic Chicken Wraps are the epitome of comfort food wrapped in a convenient tortilla. Bursting with flavor and texture, these wraps make for a delicious lunch, quick dinner, or even a party appetizer that’s bound to impress. Imagine tender, shredded chicken blended with a creamy garlic cheese filling, complemented by crunchy lettuce and fresh tomatoes all wrapped up in a soft tortilla. This recipe captures the essence of satisfying home-cooked meals and is perfect for any occasion, from family gatherings to busy weeknights when you want something delicious yet easy to prepare.
What makes these wraps truly special is their incredible versatility. You can serve them as is, or elevate the experience with your favorite sauces, whether it be ranch dressing or zesty salsa. The fusion of cheesy goodness paired with the aromatic hint of garlic creates a flavor profile that is simply irresistible. So, if you’re ready to make a meal that everyone will love, keep reading for the full scoop on these Cheesy Garlic Chicken Wraps!
Why You’ll Love This Recipe
- Quick and Easy: Ready in about 30 minutes, these wraps are perfect for busy weeknights.
- Flavorful: A combination of garlic, chicken, and cheese provides a delightful taste explosion.
- Kid-Friendly: Kids will love the cheesy filling, making it a great meal for the whole family.
- Versatile: Customize your wraps with different veggies, sauces, and tortillas.
- Meal Prep Friendly: Make a big batch in advance and enjoy throughout the week.
What Makes This Recipe Special
At the core of Cheesy Garlic Chicken Wraps is a harmonious blend of simple yet satisfying ingredients. Shredded chicken serves as the protein-packed foundation for the meal, adding heartiness and texture. The creamy mayonnaise binds the filling together, while minced garlic and garlic powder deliver that unmistakable flavor that garlic lovers crave. You can choose between cheddar or mozzarella cheese, both of which melt beautifully, enveloping the chicken in gooey goodness.
Paprika adds a touch of warmth and slight smokiness to the mix, enhancing the overall flavor. With a touch of salt and pepper, this filling is just a step away from perfectly seasoned. Each bite of the wrap includes not only the chicken mixture but also the refreshing crunch of shredded lettuce and the pop of juicy diced tomatoes, making it a balanced meal.
The simplicity of this recipe really shines through, as it’s composed of ingredients you likely already have on hand. Plus, the option to personalize each wrap allows for creativity in the kitchen!
Ingredients

- 2 cups cooked chicken, shredded
- 1 cup shredded cheese (cheddar or mozzarella)
- 1/4 cup mayonnaise
- 2 cloves garlic, minced
- 1 tsp garlic powder
- 1 tsp paprika
- Salt and pepper to taste
- 4 large tortillas
- 1 cup lettuce, shredded
- 1/2 cup diced tomatoes
- Optional: ranch dressing or salsa for serving
Key Ingredients Explained:
- Cooked Chicken: The base of your wrap, you can use rotisserie chicken for extra convenience.
- Shredded Cheese: Choose your favorite type, but opt for something that melts well.
- Mayonnaise: Adds creaminess; can be swapped with Greek yogurt for a healthier option.
- Garlic: Fresh garlic provides an intense flavor; don’t skimp on this!
- Tortillas: Large tortillas are essential for wrapping, but feel free to use whole-grain or gluten-free options.
Ingredient Notes and Easy Substitutions
- Chicken: If you don’t have cooked chicken, poached or grilled chicken breast works perfectly. Can also substitute with tofu for a vegetarian option.
- Mayonnaise: For a lighter version, consider using plain yogurt, or try a flavored mayo for added zest.
- Tortillas: Corn tortillas can be used for a gluten-free version; although they may be slightly less pliable, they are delicious.
- Vegetables: Feel free to add other veggies like bell peppers, cucumbers, or avocado for extra crunch and flavor.
Instructions
- In a bowl, combine the shredded chicken, cheese, mayonnaise, minced garlic, garlic powder, paprika, salt, and pepper. Mix well until all ingredients are evenly incorporated.
- Lay a tortilla flat and place a portion of the chicken mixture in the center—about 1/4 of the mixture is ideal for each wrap.
- Top with shredded lettuce and diced tomatoes for freshness and crunch.
- Fold the sides of the tortilla over the filling, then roll it up tightly from the bottom to secure the filling inside.
- Repeat with the remaining tortillas and filling until all are assembled.
- Cut wraps in half and serve with ranch dressing or salsa if desired.
Expert Tips for the Best Results
- Prepping Ahead: You can prepare the chicken mixture ahead of time and store it in the fridge for up to 2 days before assembling for an even quicker meal.
- Flavor Boost: For an added kick, include a dash of hot sauce in the chicken mixture.
- Serving Style: If you want to impress, serve the wraps with a side of homemade salsa or guacamole.
- Cooking the Tortillas: Lightly toast the tortillas in a skillet before wrapping them to enhance their flavor and make them more pliable.
Variations
- Buffalo Chicken Wraps: Add hot sauce to the chicken mixture and serve with blue cheese dressing.
- Veggie Delight: Incorporate grilled zucchini, mushrooms, or spinach for a vegetarian take.
- Southwestern Style: Mix in black beans and corn with a sprinkle of cumin for a Tex-Mex flavor.
- Caprese Wrap: Replace traditional ingredients with mozzarella, tomatoes, basil, and balsamic glaze for a fresh twist.
Serving Suggestions
Serve your Cheesy Garlic Chicken Wraps with a side of crispy sweet potato fries, a fresh garden salad, or homemade potato salad for a complete meal. Additionally, drizzling with ranch or topping with salsa can elevate the flavor profile even more. For drinks, pair these wraps with an ice-cold lemonade, iced tea, or even a light beer for a casual gathering.
Storage and Reheating
Leftovers can be stored in an airtight container in the fridge for up to 3 days. To reheat, simply place a wrap in a microwave for about 30 seconds, or until heated through. For a crispier texture, warm the wraps in a skillet on medium heat until just golden and warmed through.
Common Mistakes to Avoid
- Overfilling: Adding too much filling can make folding the wraps difficult and may lead to spillage. Stick to a modest amount for easier handling.
- Under-seasoning: Make sure to taste your mixture before rolling to ensure it’s flavorful. Adjust seasoning as needed.
- Cold Ingredients: For the best texture, allow your filling ingredients to come to room temperature before assembling.
FAQ
Can I use leftover rotisserie chicken?
Absolutely! Leftover rotisserie chicken is a fantastic shortcut for this recipe and adds great flavor.
Can I freeze these wraps?
Yes, these wraps can be frozen before being rolled. Simply wrap each one tightly in plastic wrap and place them in a freezer bag. When ready to eat, thaw and reheat them in a skillet or microwave.
What kind of cheese works best?
Both cheddar and mozzarella cheese melt wonderfully, so use whichever you prefer. For a stronger flavor, try pepper jack cheese.
How can I make these wraps healthier?
You can use whole grain or low-carb tortillas, Greek yogurt instead of mayonnaise, and load them up with fresh veggies.
Can I prepare these wraps ahead of time?
Certainly! You can prepare the filling a day in advance and assemble your wraps just before serving to keep the tortillas fresh.
Conclusion
In conclusion, Cheesy Garlic Chicken Wraps are a delightful addition to your meal repertoire—quick, flavorful, and easy to personalize. With just a handful of ingredients, you can create a satisfying meal that’s perfect for any occasion. Whether you’re cooking for yourself, your family, or friends, these wraps are sure to be a hit. So gather your ingredients, roll up your sleeves, and get ready to enjoy a delicious dish that you’ll want to make again and again. Don’t forget to save this recipe for later; it’s bound to become a favorite in your household!

Cheesy Garlic Chicken Wraps
Ingredients
Method
- In a bowl, combine the shredded chicken, cheese, mayonnaise, minced garlic, garlic powder, paprika, salt, and pepper. Mix well until all ingredients are evenly incorporated.
- Lay a tortilla flat and place a portion of the chicken mixture in the center—about 1/4 of the mixture is ideal for each wrap.
- Top with shredded lettuce and diced tomatoes for freshness and crunch.
- Fold the sides of the tortilla over the filling, then roll it up tightly from the bottom to secure the filling inside.
- Repeat with the remaining tortillas and filling until all are assembled.
- Cut wraps in half and serve with ranch dressing or salsa if desired.

Leave a Comment