

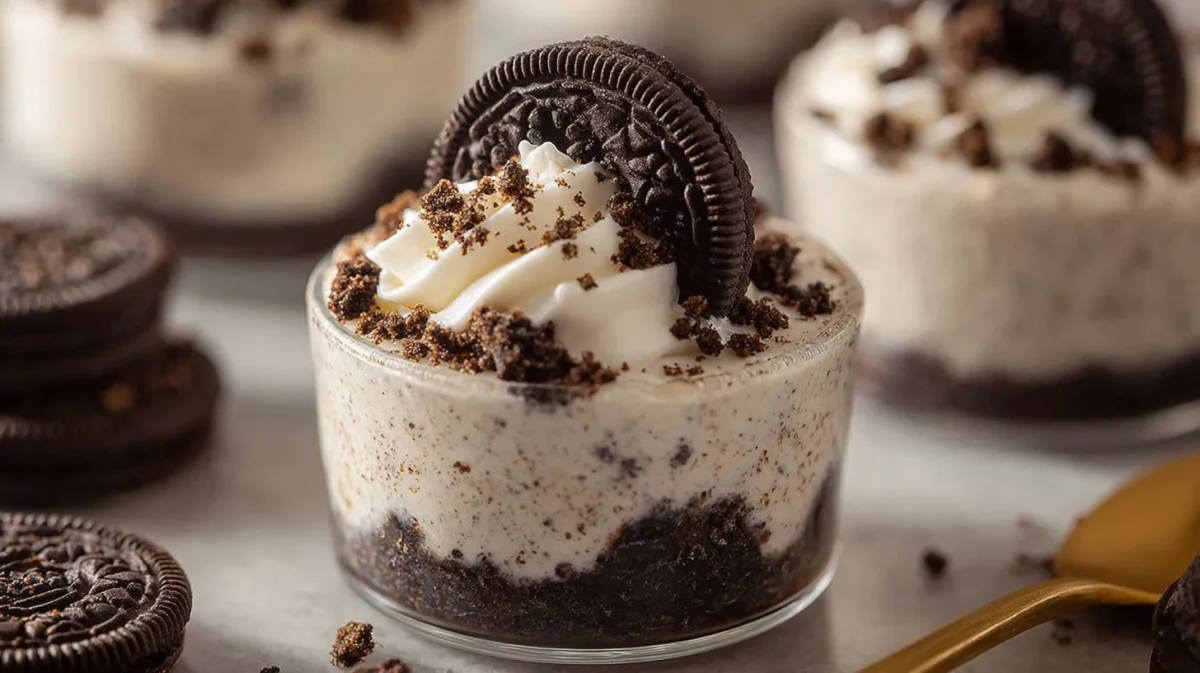
Indulge in a simple yet extravagant treat that’s perfect for any occasion. This delightful dessert features a luscious creamy filling layered over a crumbly cookie base, making it an ideal dessert for gatherings or a sweet finish to a cozy meal. With an airy texture complemented by the iconic crunch of chocolate cookies, each spoonful is sure to entice and satisfy your cravings. Plus, it requires no baking, saving you time while still delivering a show-stopping result. Let’s dive into the details of creating this irresistible dessert!
Quick Snapshot: What You’re Getting (In Plain English)
- Time: About 1 hour plus chilling | Difficulty: Easy | Servings: Makes 6 servings | Best Occasion: Perfect for parties, picnics, or a simple dessert
- Flavor Notes: Rich chocolate from the cookies, creamy sweetness from the filling, and a hint of vanilla | Texture Promise: Ultra creamy with a delightful crunch
The “Why It Works” That Actually Helps You Cook
This method maximizes flavor while minimizing effort. By blending cream cheese with whipped topping until smooth, you create a rich base that remains light thanks to the whipped elements. The folding in of crushed cookies not only adds texture but also infuses the filling with deep chocolate flavor. The key to success? Patience during the chilling process. Allowing the dessert to set ensures the flavors meld beautifully and the texture becomes perfectly cohesive, leading to a creamy yet structured bite.
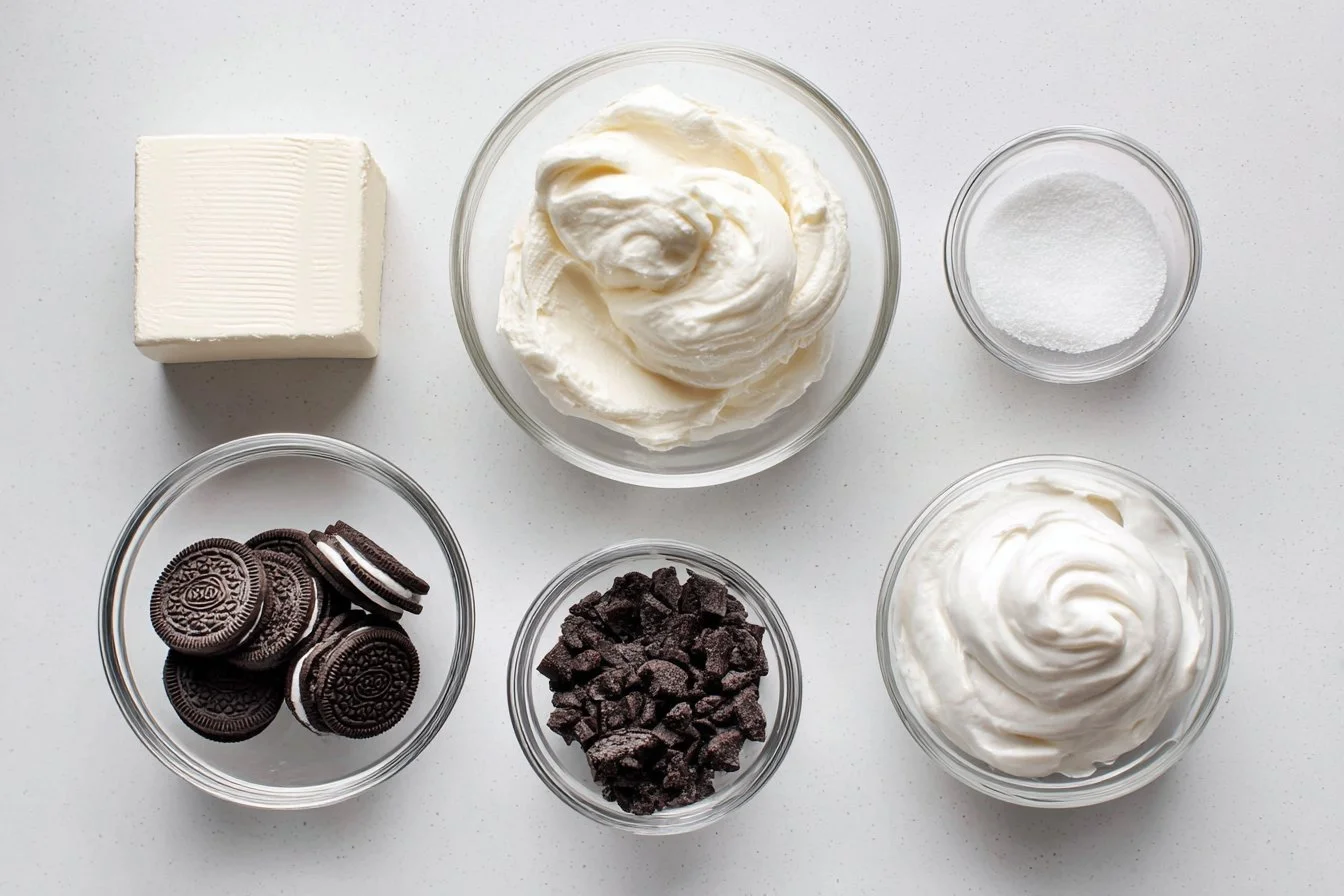
The Ingredient Lineup (Plus Smart Swaps That Won’t Ruin It)
- 1 8 oz block of cream cheese, softened – can substitute with mascarpone for a richer flavor
- 1 8 oz. container Cool Whip or whipped topping – homemade whipped cream works too
- 2/3 cup powdered sugar – for a lighter option, consider honey or maple syrup
- 1 tsp vanilla – vanilla bean paste or extract can elevate the flavor profile
- 24-26 Oreo cookies – gluten-free chocolate sandwich cookies are a great alternative
{image_template}
Do This, Then This: The Foolproof Step-by-Step
- Begin by placing the Oreos in a plastic bag and sealing it tightly. Use a rolling pin or a sturdy wooden spoon to crush them into fine crumbs.
- In six small dessert dishes (each with a capacity of about 3/4 cup to 1 cup), spoon approximately 1 1/2 – 2 tablespoons of the crushed Oreos into each, creating the base. Set these aside.
- Using a hand mixer or a stand mixer, whip the softened cream cheese and powdered sugar together until the mixture is creamy and smooth.
- Add the vanilla extract and mix until combined, then gently fold in the Cool Whip until fully integrated.
- Next, fold in the remaining crushed Oreos to incorporate for added texture and flavor.
- Evenly divide the cheesecake mixture among the prepared dessert dishes, gently pressing it down onto the crushed Oreo layer.
- Chill the dessert in the refrigerator for about 1 hour, or until you’re ready to serve it. This will enhance firmness and enrich flavors.
- Just before serving, top each cup with whipped cream and a sprinkle of additional crushed Oreos for that extra touch of indulgence.
Flavor + Texture: What You Should Notice in Every Bite
Expect a blissful combination of tastes and textures upon your first scoop. The initial crunch of the Oreo base gives way to a luxurious creamy filling that balances sweet and slightly tangy notes from the cream cheese. Each bite should feel indulgently smooth with complementary layers of flavor enhancing the classic chocolate cookie taste. If you prefer a bit more sweetness, simply add an extra spoon of powdered sugar to the filling. For a refreshing twist, consider adding a splash of lemon juice to brighten the flavor without overwhelming the rich base.
Effortless No-Bake Fun with Cream Cheese
When pressed for time, this no-bake technique shines. You can whip these up in a flash with minimal prep and clean-up. The combination of cream cheese and whipped topping creates the ultimate filling with a creamy allure that rivals baked cheesecakes. Plus, using crushed cookies means no additional mixing bowls are needed for the crust, making it a highly efficient option. Perfect for a weeknight treat or a last-minute dessert for unexpected guests!
Deliciously Creamy Yet Light with Cool Whip
The secret to achieving that beautifully airy texture lies in the Cool Whip or whipped topping. This ingredient not only keeps the filling light but also enhances its creamy texture, making each bite feel indulgent without being overly heavy. When combining the whipped topping with other ingredients, take care to fold gently. This method retains the airiness while ensuring a smooth consistency that results in a dessert that feels luxurious on the palate.
Chill for a Firm Yet Velvety Finish
Patience pays off in desserts like this one. After assembly, chilling is essential! The refrigeration allows the flavors to blend seamlessly and helps the filling firm up for a heartier bite. If you’re preparing these in advance for an event, aim to chill for a minimum of one hour to ensure the texture is perfectly set. For serving later, you can keep the cups chilled for several hours without losing the delightful creamy consistency.
Perfect for Make-Ahead Delights
These delightful cups are ideal for meal prep or parties. You can assemble them a day or two in advance, making your hosting responsibilities a breeze. Simply prepare and fill the cups, cover them with plastic wrap, and store them in the refrigerator. When it’s time to serve, just add the finishing touches with whipped cream and extra crushed cookies. Having a sweet treat ready to go allows you to focus on the celebration rather than the kitchen, allowing your guests to indulge without the wait!
Common Mistakes (And the Fast Fix for Each One)
- Mixing too aggressively: This can deflate the whipped topping, leading to a denser filling. Use a gentle folding technique to maintain lightness.
- Not chilling long enough: Skipping the chilling step will result in a runny dessert. Always allow it to set for at least one hour.
- Not crushing Oreos finely: Large chunks can disrupt the texture. Make sure to crush them to a fine crumb for an even dessert base.
- Overbaking the crust (if using a baked option): Since this recipe is no-bake, be mindful of texture if you ever go baked; check for golden edges.
- Adding too much sugar: This might overwhelm the flavor balance. Start with less and adjust to taste.
Make It Yours: 6 Variations That Still Keep the Recipe Solid
- Mint Chocolate Delight: Add a few drops of peppermint extract to the filling for a refreshing mint flavor.
- Peanut Butter Swirl: Fold in creamy peanut butter for a decadent twist.
- Fruit Infusion: Mix in a handful of chopped fresh strawberries or raspberries for a fruity pop.
- Chocolate Ganache Drizzle: Top with a simple microwave ganache for an elegant touch.
- Nutty Crunch: Incorporate crushed nuts like pecans or almonds for added texture.
- Vegan Version: Use a dairy-free cream cheese and coconut whipped cream to enjoy a plant-based alternative.
Quick Answers Before You Start
Can I make this dessert ahead of time?
Yes! This dessert can be made a day or two in advance. Just store it covered in the refrigerator until ready to serve.
How long can I store the leftovers?
Leftovers can be enjoyed for up to 3 days in the refrigerator. Make sure to keep them covered to maintain freshness.
Is it possible to freeze these cups?
While the filling can freeze for a short period, it’s best enjoyed fresh or chilled. If you do freeze, label and wrap them well and consume within a month.
What if I don’t have a mixer?
You can still achieve a great consistency by hand mixing. Just be sure to soften the cream cheese thoroughly and use a whisk for best results.
Can I use a different type of cookie for the crust?
Absolutely! Any chocolate sandwich cookie can be substituted, or try using graham crackers for a different flavor profile.
What should I do if the filling is too thick or too runny?
If it’s too thick, you can add a splash of milk to loosen it slightly. For a runny filling, ensure proper chilling time and check the ratios of your ingredients again.
Final Notes (So You Nail It the First Time)
Unleashing this dessert will undoubtedly impress everyone at the gathering. The contrast of flavors and textures creates sheer joy in every bite. So, fill those cups, chill, and enjoy! Save or print this recipe and make it tonight—you won’t regret it!
No-Bake Cookies and Cream Cheesecake Cups
Ingredients
Method
- Place the Oreos in a plastic bag and crush them into fine crumbs using a rolling pin or sturdy wooden spoon.
- Spoon approximately 1 1/2 – 2 tablespoons of the crushed Oreos into each of six small dessert dishes, creating the base. Set these aside.
- In a mixing bowl, whip the softened cream cheese and powdered sugar together until creamy and smooth.
- Add the vanilla extract and mix until combined, then gently fold in the Cool Whip until fully integrated.
- Fold in the remaining crushed Oreos to incorporate for added texture and flavor.
- Evenly divide the cheesecake mixture among the prepared dessert dishes and gently press it down onto the crushed Oreo layer.
- Chill the dessert in the refrigerator for about 1 hour before serving.
- Just before serving, top each cup with whipped cream and a sprinkle of additional crushed Oreos.


Leave a Comment